
By Anamoly Press Team • October 7, 2026
💡 Technical Review & Accuracy Check by Christopher Armstrong, Founder & Head of R&D
Our team researches and writes the gear guides you love, but every scientific claim and compound specification is personally vetted by our lead engineer to ensure absolute accuracy.
📌 Short Answer
Compare a flat-pedal shoe as a system: rubber, tread, pedal pins, sole support, and secure fit all affect how predictable the connection feels. Then match protection and walkability to your trails. A useful choice is the one that balances those needs for your riding, not the one with a single headline feature.
Searching for the best mountain bike flat pedal shoes is really a search for a shoe that holds its position on your pedals without fighting your feet or your riding style. Start by comparing the rubber and pin interface, then check sole support, toe room, protection, weather behavior, and walkability as a connected system, because no single outsole specification settles the decision for every rider or trail.
Test drive the Pin-Lock MTB risk-free
What should the best mountain bike flat pedal shoes do?
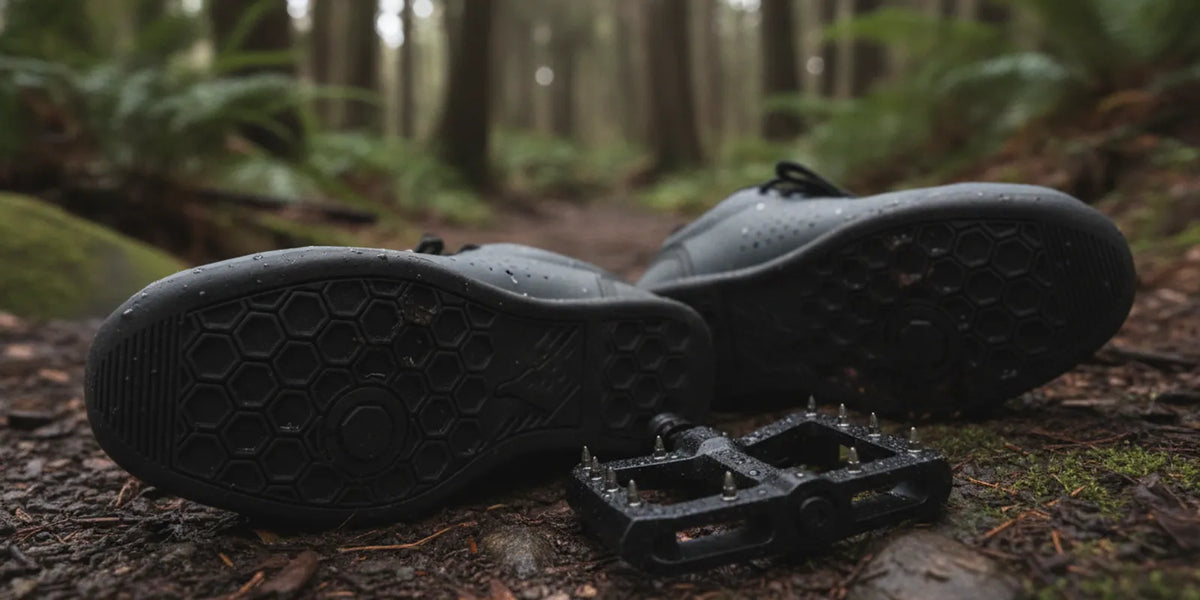
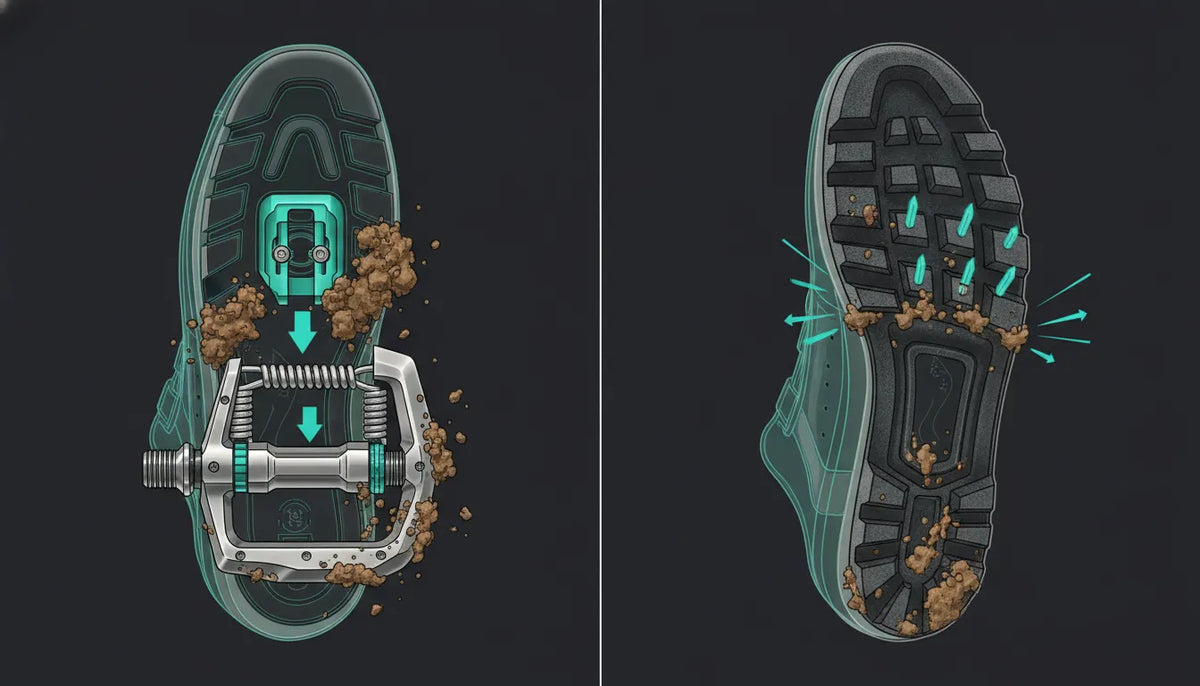
A flat-pedal shoe connects your foot to a platform through friction and the physical engagement between the outsole and pedal pins; unlike a clipless setup. It does not lock your shoe into a cleat, so you can reposition or remove your foot, making the shoe-pedal interface central to control and comfort.
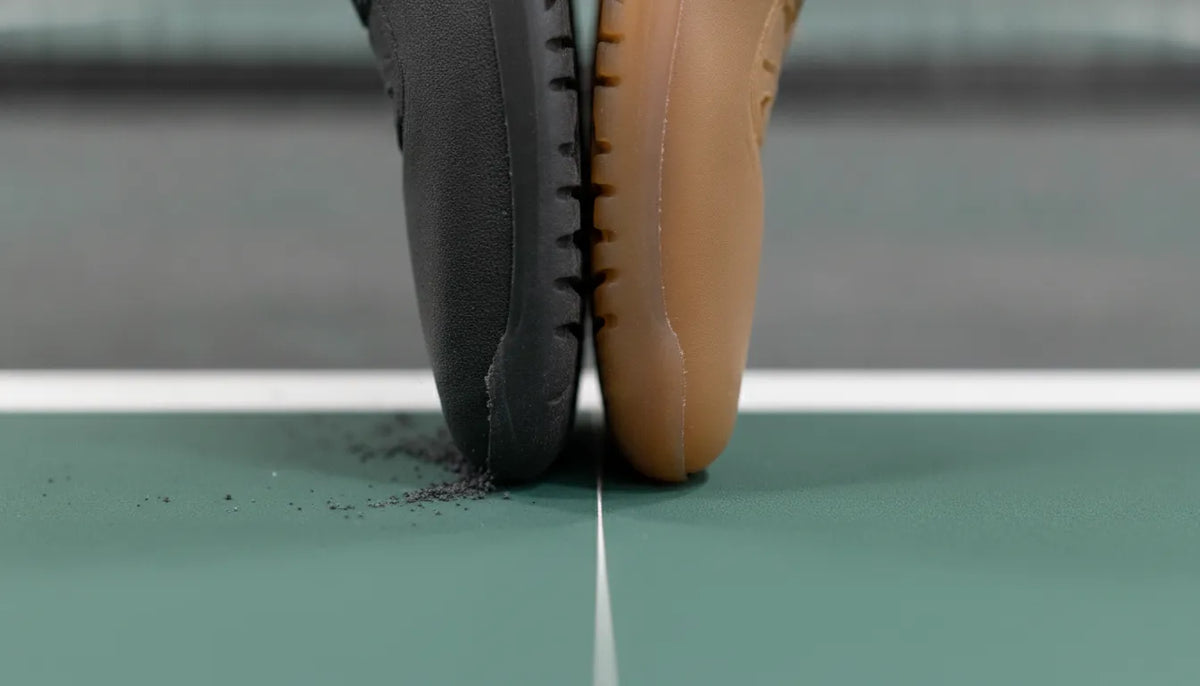
That interface is not just the rubber compound: the tread pattern has to let pins meet the sole. The outsole has to deform and recover in a useful way. And the sole structure has to support your foot while transmitting force; fit matters too. Because excess movement inside the shoe can make an otherwise capable sole feel imprecise.
Think about your actual ride before comparing stated features: a rider on smooth local trails may value easy walking and ventilation. While someone regularly riding rocky descents may put more weight on foot protection and a stable platform. A muddy route adds another question, namely how well the shoe clears debris and how the compound behaves when damp.
How do rubber and pedal pins work together?
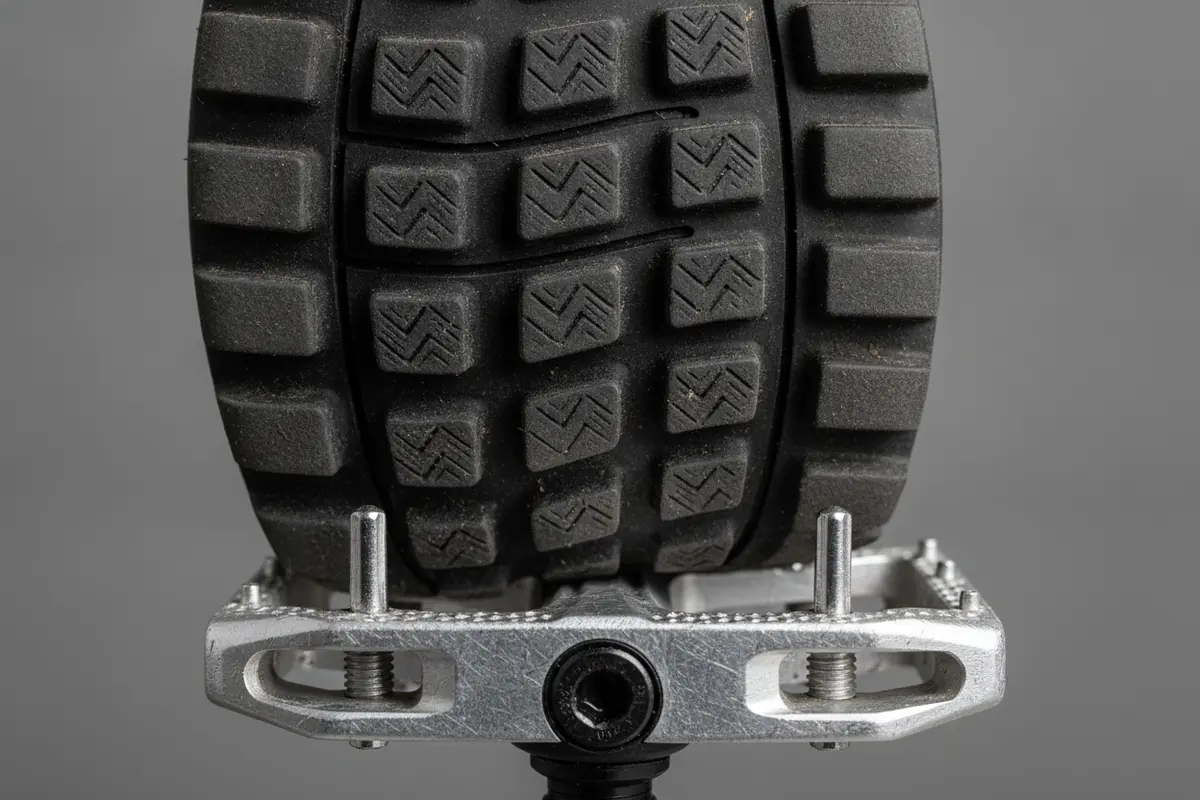
Pedal pins create small points of contact with the outsole, and rubber can conform around those points under load. The depth, spacing, and shape of the tread influence where contact happens. With the goal of a predictable interface that resists unwanted movement without making it difficult to reposition your foot when you need to.
Consider compound and tread together: a sticky-feeling rubber compound cannot make up for a sole pattern that leaves the pins poorly engaged. While an aggressive-looking tread is not proof of useful pedal grip. The actual feel depends on the pedal, shoe, rider load, trail conditions, and how the shoe is worn.
When comparing shoes, inspect the outsole rather than relying on a label alone:
- Pin contact zones: Look for a relatively clear area where pedal pins can meet the sole; tall lugs in the wrong place may interfere with that contact.
- Edge and perimeter tread: Check whether the tread provides useful purchase when walking or moving the bike, without assuming that more height automatically means more pedal grip.
- Rubber coverage: Note where the compound sits and whether the toe and heel have separate walking-oriented tread features.
- Wear pattern: If trying a shoe, inspect how its contact area lines up with your pedal; a visible mismatch is more useful information than a generic grip claim.
There is no universal pin setting or outsole pattern that works with every pedal. So if you already own pedals, take them into account when selecting shoes; if you are choosing both. Compare the contact area and pin layout as a pair, then use a cautious test on a familiar, low-consequence ride before relying on a new shoe-pedal combination on technical terrain.
Our Hero Rubber™ MTB-G Compound is engineered to become grippier when wet; that behavior is one part of the interface—surface material, mud, wear, and pedal condition still shape how secure any setup feels. For more on the relationship between moisture and compound behavior, see our guide to wet-traction mountain bike shoe physics and our overview of MTB shoe grip, rubber technology, and weather performance.
How much sole stiffness do you need?
Sole stiffness is a balance, not a contest to find the most rigid shoe; in practice—a supportive sole can distribute pressure across the foot and keep the platform feel composed when pedaling hard or standing for long stretches, while a more flexible shoe may feel easier to walk in and suit riders who often hike short sections.
Too little support for your preference can leave your feet feeling fatigued or concentrated against the pedal, while too much stiffness can make walking feel awkward and may not add value if your rides are short or mostly smooth. The right level depends on ride duration, terrain, body comfort, and whether you regularly have to push or carry the bike.
Try to assess the complete shoe rather than bending the outsole in your hands and treating that as a verdict. A shoe has layers and reinforcements that affect how force feels underfoot. So during a test, notice pressure under the arch and forefoot. Whether your foot shifts on the pedal, and whether the shoe remains comfortable when walking off the bike.
For a deeper look at the factors that shape a shoe, use this engineering buyer guide to MTB shoes. It helps separate sole structure from rubber grip, so the two do not get collapsed into one vague rating.
How should the shoe fit around your foot?
A stable fit holds the heel and midfoot without pinching the forefoot; leave enough toe room for comfort and foot movement, while avoiding so much internal space that your foot slides during pedaling or when the bike pitches, because a shoe that feels secure standing still may feel different once you are pushing into the pedal.
Try shoes later in the day if your feet tend to swell, and wear the socks you normally ride in; fasten the closure as you would on a ride, then walk, flex your toes, and stand with your weight forward, checking for heel lift—pressure at the widest point, rubbing over the instep, and contact between toes and the front of the shoe.
Wide feet deserve particular attention because sizing up can add length without creating the width or forefoot shape you need; look for an appropriate wide toe box and a secure hold through the rest of the shoe, since width should not come at the cost of the heel moving around. If the fit is close but pressure is localized, find out whether the manufacturer offers an approved adjustment before attempting to modify the shoe yourself.
We offer heat-stretch widening as a fit customization for our MTB footwear. Check current product information and ask our team whether the specific area and shoe model are suitable before ordering. Read our broader cycling shoes for wide feet fit guide and learn how heat-stretching for a custom MTB shoe fit works.
Fit recommendations for the bike also depend on the whole riding position. A University of Wisconsin Transportation Services bicycle handout notes that, with a leg hanging at the bottom of the pedal rotation, its heel should barely touch the pedal. This is a bike-fit cue rather than a shoe-sizing rule, so use it only as a starting point and consult an appropriate fitter if your setup causes discomfort: University of Wisconsin bicycle handout.
What protection and weather features matter?
Trail protection can mean a reinforced toe, coverage around the sides, or materials that resist abrasion. These features may help shield the foot from routine contact with trail debris. But no shoe should be treated as protection against every impact, so compare the placement and feel of reinforcements with the hazards you actually encounter.
Weather performance also involves tradeoffs: a more covered upper may help reduce exposure to spray and debris, yet it can feel warmer and may take longer to dry, while a breathable upper can be comfortable in warm weather yet offer less coverage in cold rain. Water resistance, waterproofing, drainage, and wet grip describe different properties; do not assume one means the others.
For a damp ride, consider whether the outsole clears mud, whether the upper dries at a practical pace, and whether your socks and route length suit the conditions. In cold weather, space for appropriate socks can matter, but a shoe that is too roomy may let your foot move. Our all-weather mountain bike shoe guide discusses wet, muddy, and cold conditions, while the mud-resistant shoe guide focuses on compound and trail use.
How do you compare the best mountain bike flat pedal shoes for your riding?
Use a consistent checklist for every candidate: a product page may emphasize one feature—but the decision is easier when you compare the same practical questions across all the shoes you are considering.
| Decision point | What to compare | Why it matters |
|---|---|---|
| Rubber and pin interface | Compound claims, outsole contact zones, tread placement, and compatibility with your pedal | These factors work together to shape how planted or mobile the connection feels |
| Sole support | Underfoot comfort while pedaling, pressure distribution, and ease of walking | Stiffness is a comfort and support tradeoff, not a stand-alone score |
| Fit and toe room | Heel hold, midfoot security, forefoot width, and toe clearance | A foot that moves inside the shoe can undermine a secure-feeling pedal interface |
| Protection and upper | Toe and side coverage, ventilation, water resistance, drainage, and drying | Choose features for the conditions you encounter rather than assuming one upper suits every season |
| Walkability | Tread for walking, sole feel off the bike, and how often you hike or push | More trail walking can shift the balance toward comfort away from the pedals |
| Support and service | Current fit guidance, customization availability, return and exchange terms | Clear, current information helps resolve fit uncertainty before purchase |
Give each row a priority based on your riding: high, medium, or low. Then compare two or three candidates against those priorities rather than attempting to score every specification equally—a shoe with a strong feature in a low-priority category may be a poorer match than one that solves your main comfort or control concern.
Price should be checked at the time you buy, because offers can change. Compare the current listed price and the terms that apply to your order, including returns and size exchanges; do not rely on an old review or promotion. If an adjustment or customization is offered, confirm eligibility, timing, and any order steps directly with the brand.
How can you narrow a shortlist?
Start with fit as a pass-or-fail screen: if a shoe pinches, allows your heel to lift substantially, or leaves your forefoot cramped, a strong feature elsewhere may not compensate. Then compare candidates that pass the fit check using only a few meaningful criteria. This keeps the choice grounded in comfort and riding rather than a long list of specifications that may not affect you.
For each model, write down what is confirmed and what is still unclear. Confirmed details might include a stated outsole material or a published fit option, while uncertain details might include how the shoe pairs with your particular pedals or whether its toe shape suits your foot. Ask about uncertainties that could change your decision, and do not treat missing product information as proof of a feature.
Finally, compare what happens if the fit is not right. Review the current return and exchange terms before buying, especially if the shoe will be ordered online or altered for fit. A customization can address a specific pressure point, but it should not replace checking the model's basic sizing and fit suitability first.
How do riding style and terrain change the priorities?
A shoe comparison becomes clearer when you describe a normal ride instead of an idealized one. Think through the route from the first pedal stroke to the ride home: how much time is spent pedaling, descending, walking, and handling the bike on the ground? Those details help distinguish a feature you will use every ride from one that looks impressive but rarely affects your experience.
- Mostly smooth trails: Prioritize a comfortable fit, reliable pedal contact, and a sole that feels appropriate over your typical ride length. Extensive impact coverage may be less important than all-day comfort.
- Rocky or rough trails: Pay closer attention to toe and side coverage, underfoot support, and whether your foot stays settled on the pedal when terrain gets uneven.
- Routes with hike-a-bike: Give walkability more weight, checking how the tread feels on foot and whether the sole is comfortable during short pushes or carries.
- Frequently wet or muddy routes: Evaluate compound and tread descriptions, drainage and drying, and how you will maintain the shoe. Avoid treating a wet-grip claim as a substitute for adjusting speed and line choice.
- Long rides: Treat pressure points, closure comfort, and toe room as high priorities, because small discomforts can become more noticeable as time in the shoe increases.
These are comparison prompts, not prescriptions—a rider can have several of these needs at once, and one shoe may not maximize every category. Decide which two or three needs matter most, then use them to guide a practical test rather than trying to find a model that claims to do everything.
What should you test before a longer ride?
Start indoors with the shoes fastened and your own pedals if practical. Set each foot on the pedal, check that the pins contact the intended sole area, and try repositioning your foot. The shoe should not feel loose inside, and the pedal should not catch on a tall tread feature in a way that blocks normal placement.
Next, take a short ride on familiar terrain. Pay attention to whether your foot shifts under normal effort, whether you can make small position changes, and whether hot spots appear. Stop and inspect the sole and pedal if the interface feels inconsistent; dirt, worn pins, or damaged tread can affect the experience.
Increase ride length and trail difficulty gradually, rather than making the first test a demanding descent. Recheck the fit after a few rides, because closure tension and comfort can feel different once the shoe has been worn. If pain persists, stop using the setup and seek qualified advice; discomfort is not something to solve by simply tightening the shoe.
A shoe's condition is part of the comparison. Look for outsole wear around the pedal-contact area, loose components, damaged closures, and changes in the upper. Grip can change as a shoe and pedal wear, so periodically checking both parts of the interface is more useful than assuming performance remains constant indefinitely.
How can you check pedal compatibility before buying?
Compatibility is more than whether a shoe can sit on a pedal. The outsole needs to meet the pedal in the area where its pins can work. And the shoe should still allow the rider to place and reposition a foot in a controlled way. If you can, compare the shoe and pedal physically; product photos can help you inspect tread placement. But they do not show how the interface feels under your weight.
Use this simple check with a stationary bike or while holding the bike securely:
- Set the shoe on the pedal in your usual riding position, then check where the pins meet the sole.
- Move your foot slightly forward, back, and sideways; notice whether tread blocks snag or prevent the position change you expect.
- Lift and replace the foot a few times, keeping the bike stable; observe whether it returns to a consistent position.
- Inspect the shoe and pedal for wear, dirt, or damage that could affect contact, and clean or service components as appropriate.
This is an initial fit check, not a substitute for a ride test. Your force, stance, pedal shape, and terrain affect the interface, so repeat the assessment on a familiar trail at an easy pace. If you are changing both shoes and pedals, avoid changing several setup variables at once; otherwise, it can be difficult to tell which change produced a different feel.
Do not interpret the ability to reposition a foot as a flaw by itself. Flat pedals are not a mechanical cleat connection, and riders may deliberately want to move their feet. The useful question is whether the shoe stays predictable under ordinary pedaling while still allowing deliberate repositioning when needed.
What can a product description tell you, and what should you verify?
Product descriptions are useful for identifying materials, fit options, intended use, and stated technologies, but they cannot answer every personal-fit question. Separate directly stated specifications from performance language. For example, a description of outsole construction is a feature. A claim about how it feels on a particular wet rock is an experience that depends on conditions and should not be treated as a universal result.
Before ordering, verify the exact model and version, current size chart, return and exchange terms, and any customization process. Check whether an advertised adjustment applies to the part of the shoe where you feel pressure. Whether it must be requested before shipment, and how much time it adds. Those details can change, so consult current product information rather than relying on an older article or promotion.
When reading reviews, look for context: rider foot shape, pedal type, trail conditions, time in use, and the specific issue being described. A useful review says more than "grippy" or "comfortable"; it explains how the shoe behaved and what tradeoff the rider noticed. One person's fit experience can be a helpful clue, but it cannot establish how a model will fit every foot.
Make a short list of unresolved questions and ask the manufacturer before purchasing. Focus on fit and product details that would change your decision, such as width accommodation, the outsole's intended pedal interface, and the current return or exchange process. Keep the response with your order information so you can refer to it later.
Which tradeoffs should guide your decision?
For rocky, technical riding, put a premium on a secure fit, appropriate foot coverage, and a predictable interface with your pedals. For mixed rides with frequent walking, weigh tread and off-bike comfort more heavily. In wet conditions, evaluate the compound claim and tread design while remembering that slick roots, stone, and mud differ; no shoe makes every surface safe.
For wide feet, assess width before sizing up, and confirm whether a suitable wide option or customization is available. For long rides, pay close attention to pressure and sole support. For occasional rides, comfort and a reasonable fit may matter more than a technical feature you will rarely use. These are starting priorities, not rigid rules.
When comparing our Pin-Lock MTB Shoe 2.0, review the current model details, sizing information, and available fit support on the product page. We build our footwear around traction, stability, and durability; compare those priorities with the questions in this guide. Then verify any detail that matters to your particular feet and trails.
For more about our design approach, see our Tech Stack. If you still have a sizing or product question, use our FAQ and product information or contact our team before placing an order.
Test drive the Pin-Lock MTB risk-free
FAQ: mountain bike flat pedal shoes
Does stickier rubber always mean more grip?
No single compound description guarantees a particular feel on every pedal or trail. Rubber, tread layout, pedal-pin shape, surface condition, shoe wear, and fit all contribute. Treat compound claims as one factor, then check how the whole shoe-pedal interface works for your use.
Should a flat-pedal shoe have a completely smooth sole?
Not necessarily. The outsole needs to provide an area where pins can engage, while tread can also support walking and other trail contact. Compare where the tread is placed and whether it interferes with your pedal, rather than choosing solely by appearance or lug height.
Is a stiffer shoe always better for mountain biking?
No. A supportive sole may suit riders who prioritize underfoot support, while a more flexible feel may be preferable for walking comfort. Consider your route, ride length, and personal comfort, then test the shoe on familiar terrain before taking it onto a demanding trail.
Should I buy a larger size if my feet feel wide?
Not automatically. Sizing up can add length without resolving forefoot pressure, and excess length can affect fit. Compare the shoe's width and toe room, check current fit guidance, and ask about a suitable wide option or approved customization where available.
How often should I replace flat-pedal shoes?
There is no fixed interval that fits every rider. Inspect the sole's pedal-contact area, tread, upper, and closures for wear or damage, and replace a shoe when its condition or fit no longer suits your needs. Also inspect the pedals, since worn pins can change the connection.
Ready to compare your next pair of mountain bike flat pedal shoes?
Once you have compared grip, pin interface, sole support, fit, protection, weather performance, and walkability. Our Pin-Lock MTB Shoe gives you a focused way to evaluate those priorities on your own rides. We build it for riders who want a stable pedal connection, a wide toe box, and durable trail-focused construction without giving up practical comfort away from the bike.
Every pair is backed by our workmanship-defect coverage, free returns, free size exchanges, and a 30-day US return window; order your size. Put the shoes through their paces on the trail, and see how the Pin-Lock sole interface works with your pedal pins. If the fit is not right, use the applicable return or exchange option for a straightforward next step.
Test drive the Pin-Lock MTB risk-free
Sources & Scientific Citations
- University of Wisconsin Transportation Services, Bicycle Handout. Cited for the limited bike-fit reference described above; it is not a shoe-fit study.
About the Author
The Anamoly Press Team brings you in-depth gear coverage rooted in real-world testing and engineering insight. Every article is reviewed by our Head of R&D to ensure the technical claims match the science behind our designs.

Leave a comment
This site is protected by hCaptcha and the hCaptcha Privacy Policy and Terms of Service apply.